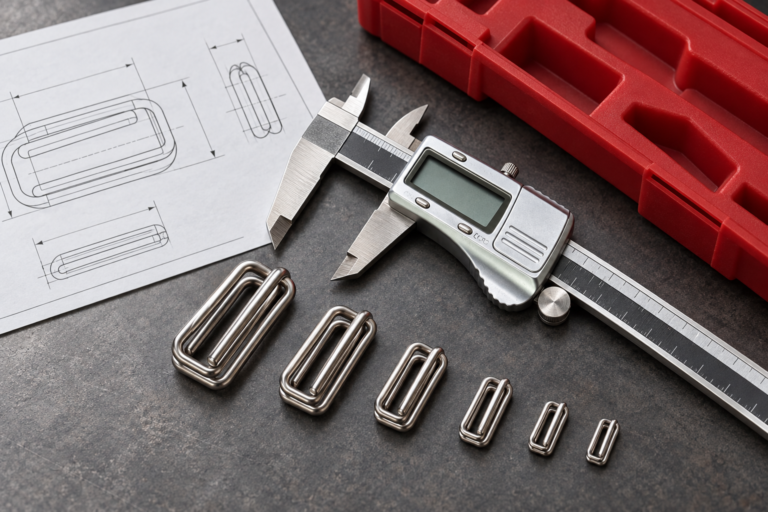
Metal hardware quality inspection verifies whether buckles, hooks, rings, sliders and other connecting components meet the approved drawings, samples and purchase requirements.
A complete inspection should cover dimensions, appearance, function, surface finish, quantity, packaging and traceable inspection records. The inspection method should be agreed before mass production rather than decided only after a problem occurs.
Quick Inspection Checklist
- Confirm the correct drawing and revision
- Verify the material and product style
- Measure critical dimensions
- Inspect burrs, sharp edges and deformation
- Test movement and assembly
- Check surface finish and color
- Verify coating or corrosion requirements when specified
- Apply the agreed sampling plan
- Check quantity, labels and packaging
- Record results in an inspection report
1. Establish the Approved Inspection Standard
Inspection results are meaningful only when the product requirements are clearly defined. Before production, the buyer and supplier should establish the documents and samples used for acceptance.
The approved standard may include:
- Technical drawing and revision number
- Approved physical sample
- Material specification
- Surface finish and color reference
- Critical dimension list
- Functional requirements
- Testing methods
- Defect classification
- Sampling and acceptance criteria
- Packaging specification
If the drawing and approved sample contain conflicting information, the discrepancy should be resolved before inspection begins.
2. Verify Product Identity and Material
Confirm that the inspected batch matches the purchase order and approved product specification.
Check:
- Product name and SKU
- Size and style
- Material description
- Finish and color
- Production batch
- Order quantity
- Packaging configuration
When material composition is critical, agree on the required material certificate or testing method before placing the order. Visual appearance alone cannot reliably confirm a metal grade.
3. Conduct First-Piece Inspection
First-piece inspection checks an initial part or initial production output before the full batch is released. It helps identify incorrect dimensions, tooling settings, assembly problems or drawing misunderstandings at an early stage.
The first-piece inspection should compare the product against:
- The current drawing revision
- Critical dimensions and tolerances
- Required material
- Shape and orientation
- Fit with connecting parts
- Surface and edge condition
Production should continue only after the required first-piece characteristics have been accepted.
4. Inspect Critical Dimensions
Not every dimension has the same effect on product function. Identify the dimensions that affect webbing fit, movement, assembly and connection strength.
| Inspection point | Why it matters | Possible inspection method |
|---|---|---|
| Overall length and width | Confirms the product size and assembly space | Caliper, gauge or approved fixture |
| Internal slot width | Affects compatibility with webbing or straps | Caliper, pin gauge or reference webbing |
| Wire or material thickness | Affects fit, weight and product performance | Caliper or micrometer |
| Hole diameter | Affects pins, screws and mating components | Caliper, pin gauge or plug gauge |
| Critical angle or opening | Affects connection and release function | Fixture, angle gauge or drawing comparison |
| Coated dimensions | Coating may affect tight-fitting areas | Measurement after surface finishing |
The drawing should state the required tolerance for each critical dimension. Do not reject or accept products based on an assumed tolerance that was never agreed.
See our Metal Hardware Size Guide for additional measurement guidance.
5. Check Appearance and Workmanship
Inspect products under consistent lighting and compare them with the approved sample.
Possible appearance defects include:
- Burrs or sharp edges
- Cracks or splits
- Distortion or uneven shape
- Visible dents
- Deep scratches
- Excessive tooling marks
- Incomplete coating coverage
- Peeling, blistering or flaking
- Uneven color or gloss
- Stains, spots or contamination
- Welding residue when welding is used
The buyer should define which surfaces are highly visible in the finished product. Appearance criteria for a visible decorative surface may be stricter than criteria for a concealed surface.
6. Check Burrs and Sharp Edges
Burrs and sharp edges can damage webbing, scratch connected products or create handling risks.
Pay particular attention to:
- Stamped edges
- Cut ends
- Internal slots
- Hook openings
- Drilled or punched holes
- Welded areas
- Areas that contact straps or fabric
If edge condition is important, include an approved sample or measurable acceptance method instead of using only general descriptions such as “smooth enough.”
7. Verify Product Function
Functional inspection should reproduce the way the hardware will be used in the final product.
Depending on the component, check:
- Whether webbing passes through the slot correctly
- Whether a slider holds and adjusts the strap
- Whether a hook opens and closes properly
- Whether moving parts operate without excessive resistance
- Whether connected components align correctly
- Whether the product rotates or pivots as intended
- Whether assembly parts remain securely connected
Use the actual webbing, mating component or an approved test fixture whenever practical.
8. Confirm Strength Requirements Separately
Visual and dimensional inspection does not prove load capacity. If the component is load-bearing, the buyer should provide a test method and acceptance requirement.
A load test specification should identify:
- How the component is mounted
- The direction of the applied force
- The test speed or holding time
- The required working load or test load
- Whether deformation is permitted
- The failure criterion
- The number of samples to test
Do not publish or rely on a load rating unless it is supported by an agreed test method and valid test result.
9. Inspect the Surface Finish
Surface inspection should compare the finished product with the approved color and appearance reference.
Check:
- Color consistency
- Gloss or matte level
- Coverage around edges and recessed areas
- Peeling or flaking
- Burn marks or discoloration
- Surface contamination
- Contact marks caused by handling
- Coating thickness when specified
The appropriate coating-thickness method depends on the base material, coating type and expected thickness. It should be selected according to the applicable specification.
Review our Metal Hardware Surface Finish Guide before confirming the finish requirement.
10. Understand Salt-Spray Test Results
A salt-spray test creates a controlled corrosive environment for comparing metal and coated-metal specimens under specified conditions.
However, a salt-spray result should not automatically be treated as the actual outdoor service life of a product. The test duration, specimen preparation, evaluation area and acceptance criteria must be defined.
If salt-spray testing is required, the purchase specification should state:
- The applicable test standard and edition
- The required exposure duration
- The number of specimens
- Whether edges and contact marks are evaluated
- The permitted type and amount of corrosion
- The required test report
ASTM B117 specifies how to operate salt-spray apparatus, but it does not select the exposure duration or acceptance result for a particular product.
11. Define Defect Categories
Before inspection, the buyer and supplier should agree on how defects are classified.
- Critical defect: A defect that may create an unacceptable safety risk or violate a mandatory requirement.
- Major defect: A defect that may cause product failure, incorrect function or significant customer rejection.
- Minor defect: A defect that does not normally prevent use but differs from the agreed appearance or workmanship standard.
The exact classification must be adapted to the product and its application. The same scratch, dimensional variation or sharp edge may have different significance depending on where the component is used.
12. Establish a Sampling Plan
For larger production batches, the buyer may use an agreed statistical sampling plan rather than inspecting every characteristic on every unit.
The sampling agreement should identify:
- Batch or lot definition
- Applicable sampling standard and edition
- Inspection level
- Acceptance criteria
- Critical, major and minor defect limits
- Rules for tightened, reduced or 100% inspection
- Action to take when a batch fails
An AQL value should not be selected without considering the product risk and customer requirements. Critical characteristics may require a different control method from ordinary appearance defects.
13. Check Packaging and Labels
Correct products can still be damaged or mixed if packaging is unsuitable.
Before shipment, verify:
- Quantity per bag and carton
- Correct product, size and color
- SKU and label information
- Separation of different variants
- Protection against scratching
- Moisture protection when required
- Carton condition
- Shipping marks
- Pallet and wrapping requirements
Packaging should be tested against the actual product weight, shape, finish and transportation method.
14. Prepare an Inspection Report
A useful inspection report should make the result traceable and understandable.
Include:
- Supplier and product name
- Purchase order and SKU
- Drawing revision
- Production quantity
- Inspection date
- Sample quantity
- Inspection criteria
- Measurement results
- Defect descriptions and photographs
- Packaging findings
- Overall pass, fail or pending result
Any deviation accepted by the buyer should be documented rather than approved only through an informal conversation.
Buyer’s Pre-Shipment Checklist
- Is the correct drawing revision being used?
- Has the approved sample been identified?
- Are critical dimensions clearly marked?
- Are appearance defects defined?
- Has the functional test been confirmed?
- Are load requirements supported by a test method?
- Is the finish specification complete?
- Is the sampling plan agreed?
- Are packaging and labeling requirements documented?
- Will an inspection report be provided?
Frequently Asked Questions
Should every metal hardware component be inspected?
The appropriate inspection level depends on the product risk, batch size and agreed quality plan. Some critical characteristics may require 100% control, while other characteristics may use statistical sampling.
Can appearance be approved from photographs?
Photographs are useful for communication, but lighting and screen differences can change the perceived color. Appearance-sensitive finishes should be approved using a physical sample when possible.
Does dimensional inspection confirm product strength?
No. Dimensions and appearance do not prove load capacity. Strength must be evaluated using an agreed test method and representative samples.
Does passing a salt-spray test guarantee outdoor service life?
No. Salt-spray testing provides comparative information under controlled conditions. It should not be used alone to predict exact service life in a natural environment.
What happens when an inspected batch fails?
The buyer and supplier should document the defect, isolate the affected batch, investigate the cause and agree on rework, sorting, replacement or another disposition before shipment.
Discuss Your Quality Requirements
Clear drawings, approved samples and measurable inspection criteria help reduce misunderstandings in custom metal hardware production.
Send your product application, drawings, dimensions, finish requirements and inspection expectations to Jinxing Hardware for review.
Submit a Custom Hardware Inquiry or contact us.
Related Guides
- Custom Metal Hardware Manufacturing Process
- Metal Hardware Size Guide
- Metal Hardware Surface Finish Guide
- How to Choose the Right Metal Hardware